
I’ve gotten the distinct honor of being allowed to beat my head against SharePoint 2013 workflows. This is in part due to rebuilding or updating servers that we use in our Power User Fast Track course. I want to share my frustration with it by using the phrase “mittens for snakes”. This phrase was introduced… Read More»
Tips from Class: Import excel to List, Alerts, and Surveys
Had a great class with our Power User Fast Track course. I walked away with some great tips from students.
Class Questions: InfoPath printing, Rules Limits, SQL filtering, and SP2013 Workflow Web Service

Whew, last week was a challenge. I just finished up running SharePoint 2013 Workflow and InfoPath No-Code Development and there were a LOT of good questions that came up. I tried to pick out the top 4 to share today.
Class Questions: Power View Integration, Document LifeCycles, and DAX
I’d like to post something a little different this week. I just finished up a course on Self Service Business Intelligence. The class was a bit smaller than usual but the number of discussions made up the difference! Here I’d like to present unique questions and answers from this particular week.
SharePoint Connect to Outlook: Work with List and Library Items in Outlook
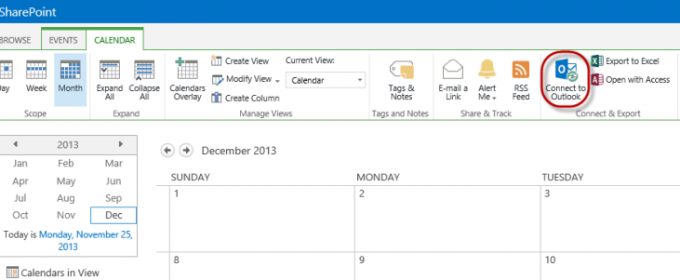
The SharePoint Connect to Outlook feature is a stellar example of the tight integration between SharePoint and other Microsoft products. While SharePoint 2013 offers even more integration than before, Connect to Outlook has been part of SharePoint since the beginning. What benefits does this easy-to-use feature offer? By connecting Calendars and other SharePoint features to… Read More»
What Is a SharePoint Site Collection Administrator?

When you think about user permissions in SharePoint, you typically think of the four main out-of-the-box permissions levels: Full Control, Design, Contributor, and Read. These, and other permissions levels, exist at every level of a SharePoint site collection. They are established on the top-level site, and are available for all subsites, list, libraries, and items.… Read More»
Add SharePoint Metadata to Word Documents
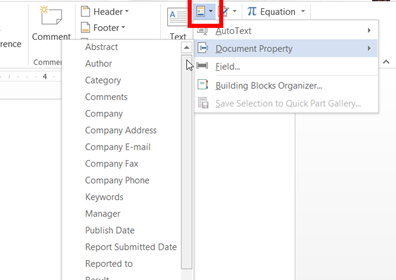
“Why would you want to use SharePoint for storing documents? We’ve always used file shares and it works just fine.” Why indeed? The simplest answer is that there is so much more that SharePoint CAN do. It just requires a little push in the right direction and a little knowledge on what CAN be done.… Read More»
- 1
- 2
- 3
- …
- 7
- Next Page »